Showing posts with label recipe. Show all posts

5.31.2011

chocolate covered orange peel

My mom really likes these. Not just oranges...but chocolate covered oranges. Everywhere we go, if she sees the chocolate covered orange peels, she'll want to buy it, except that it's supersuper expensive for some orange peels (which people throw away) and chocolate! Ridiculousness. Though I'm sure theirs tastes super delicious and yummy...but how hard can they be?

I decided to make them for my mom when she came to visit me and m. It's not hard at all, just time consuming. You have the cut the peel first, then boil it in water. Not just once, but three times!
I peeled three oranges...it was a lot...
I think this is to boil away the bitterness of the pith, if there's much left. Then create the sugar and water mixture and boil the peels in that until they are translucent. This took me around 45 minutes. Then you have to let them dry for as long as you can.
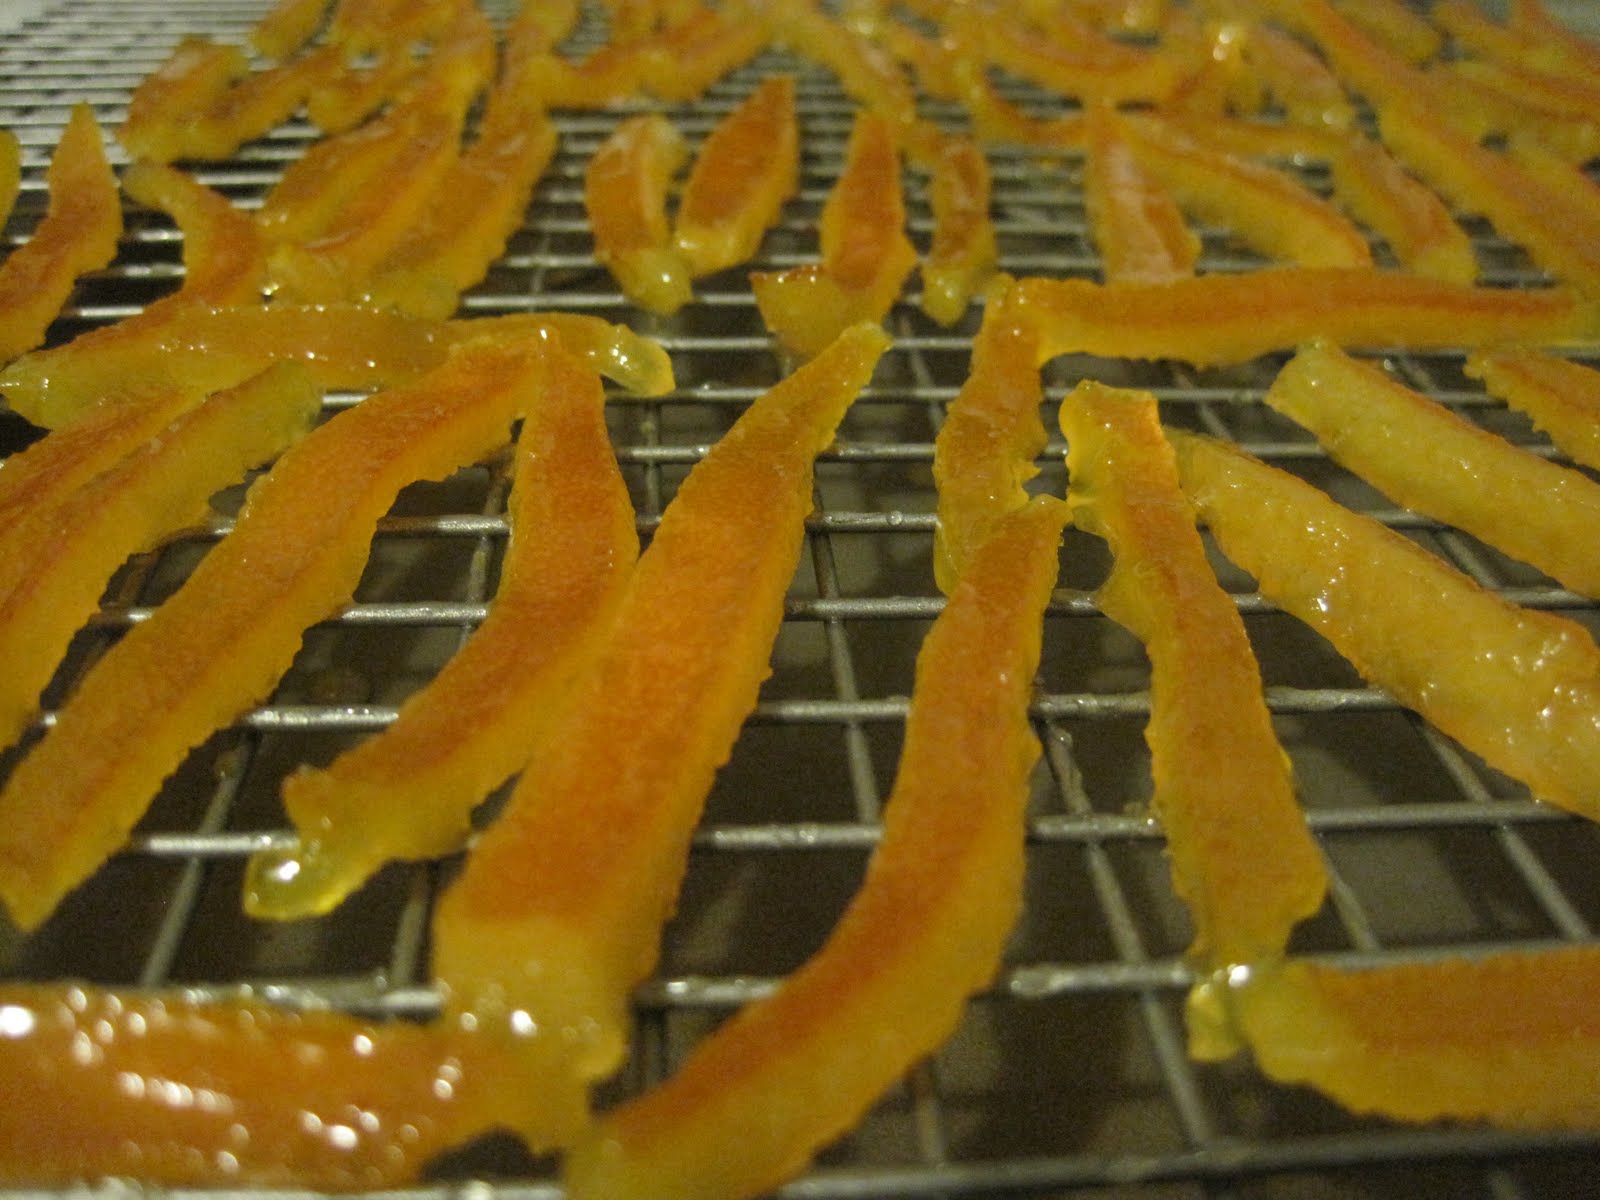
I think I could've done a better job at leaving the excess sugar off...
I dried them for 2 days. They kinda don't look right...but it was alright :]

Then dipping the peel into chocolate, what a pain. I think I'm not very good at it, or just didn't find a good way of doing it. Use good chocolate, I think it makes a difference.
But they turned out good!
Here's the recipe:

Candied Orange (Citrus) Peel
adapted from userealbutter

4 oranges, peel of (or any thick skinned orange)
3 cups sugar
1 cup water

1 cup sugar for rolling
or
8 oz chocolate for dipping

You can harvest the peel in many ways. Here are two I recommend: 1) Cut the oranges in half and juice them. Cut each half in half again and take a spoon to scrape the pulp out, leaving a clean pith. 2) Lop off the top and bottom of each orange (think of removing the polar caps where the stem and opposite end are) just to the fruit. Score the orange peel like lines of longitude every 60 degrees. Peel the orange and clean the inside of the peel with a spoon.

Cut peel into 1/4 inch strips. Place peels in a large saucepan and cover with cold water. Heat on high until water comes to a boil. Pour off the water. Repeat twice more. Combine sugar and water in the saucepan and bring to boil over high heat until temperature reaches 230F. Add peel and reduce heat to simmer. Simmer until peels are translucent (30 minutes or longer). Remove peels from syrup and roll in sugar if desired, and set on rack to dry for 4-5 hours. Once the peel is dry, you can dip in tempered dark chocolate – shake off excess, and place on foil, wax paper, or baking sheet to dry. Store in a tupperware, or if not chocolate dipped, store in sugar or as is.

5.09.2011

red velvet cupcakes!

Red velvet cupcakes are yummy. I can't remember when I made this but I'm pretty sure it was Valentine's Day. Very fitting right?
So actually, I didn't have enough food coloring, but it still looks red-ish right?
I made mini cupcakes because they're so much cuter!
They looked so good...but then...
I don't why they deflated so much!! But it's okay because that's what frosting is for!
This is a cream cheese frosting, which of course is very delicious. I had a piping bag. I used a normal circle tip. I tried to do a swirl with the icing, but it looked kinda ugly, so I just kept the tip in the center and piped and it looked like that! It looked so much better!
I messed up and so I decorated it and can you guess what it is? Hahaha
Decorated with sprinkles!

I lookedt a a lot of recipes and I basically adapted from this recipe, from my baking addiction. I'm too lazy to write the recipe, so just looked here! Enjoy!

3.29.2011

lasagna

I have random cravings for lasagna all the time. I've been meaning to make it for some time, but just never got around to it. So you know how I had pizza before, I had the pizza sauce leftover, cheese leftover, and other leftovers. Do you think that they're practically the same ingredients?!

Okay, so I didn't follow a recipe exactly...but it's all right. It turned out great. No step by step pictures this time, but yes. So inside this lasagna are the same ingredients as the pizza. There was mushroom, onions, and sausage. I added spinach as well, for some green in our food.

Ingredients:
1 box of dried lasagna (fresh is good too) - cook according to instructions
1 pound sweet Italian sausage - remove casings and roughly chop (can use any kind of meat you like, even ground meat)
1/2 cup chopped onions
1 handful of sliced mushrooms
1 can cooked spinach (I wouldn't recommend using this, fresh is better or even frozen)
1 32 ounce jar of ricotta cheese
1 egg
1/2 jar of pizza sauce
1 can tomato sauce
1/2 bag of gruyere and swiss cheese

*note: you can use more or less cheese, different kind of cheese (usually mozzarella and parmesan, i just had gruyere and swiss on hand), same as the meat and other good stuff, all according to your taste.

Directions:
Cook lasagna based on the box instructions. There are some pasta that you don't need to cook before, so check.

Meanwhile, saute the sausage, mushroom, onion together until cook through. Add the rest of pizza sauce and can of tomato sauce into the mixture. Add water into the empty jar and add the water into the mixture. Simmer the meat and tomato mixture and turn off heat. Leave to side.

Mix ricotta, egg, and spinach together. Make sure all the liquid from the spinach is squeezed out. Add half of the cheese into the mixture. You can leave the cheese out and layer the cheese on the layers, rather than mixing it with the ricotta.

Now assemble! In a 9x13 baking dish, ladle a little of the meat and tomato mixture so that it covers the bottom of the pan. Layer pasta on top, it's okay to overlap. Spread half of the ricotta mixture on top of the pasta. Ladle meat and tomato mixture on top. Layer pasta on top. And continue the layering until there's none. The very last layer should be pasta, then rest of the sauce. On top of this, sprinkle your remaining cheese.

Preheat oven to 350. Cover the lasagna with foil and bake for 30 minutes. Take the foil off after 30 minutes, and put back in oven and bake for another 20 minutes (or keep an eye on it until the cheese is nice and browned)

Sounds complicated, but it's easy!

3.24.2011

homemade pizza

I heart pizza. I am always in the mood to eat pizza. One night, jwoo decided that he wanted to make pizza. At Trader Joe's, they have fresh pizza dough in the refrigerated section, and I was always curious how it tasted and worked. I am used to using the Pillsbury kind, which is totally fine. But alas, the chance came to try it! I'd say our pizza was definitely Trader Joe-d out. :]
This was their pizza dough. They ran out of the normal kind so this is the whole wheat. I used a mixture of corn meal and flour to help it not stick. You need to allow the dough to rest outside of the package for 15 minutes or something.
These were our ingredients. Trader Joe's everything: sausage, pizza sauce, mushroom, cheese. For our sausage we had a mixture of the Sweet Italian pork and chicken sausage (Personally the pork tastes better, but I'm a fatty). There's no real recipe that I followed, it was kinda just winging it and according to your taste, but I will try my best have a logical and methodical way...
So this is all the onions, sausage, and mushroom (and garlic but you can't see it) that was chopped up. You can adjust the amount of stuff you want, depending on how meaty or oniony or mushroomy you like. I think I used 3 sausages, a hand full of mushrooms, a little less than half an onion, and 2-3 cloves of garlic.
Saute all that goodness together with a drizzle of olive oil, not too much because the sausage has fat in it. Cook until all are browned. Set aside.
Roll out the dough. Actually, we kinda just pushed it out very gently and tried to make it as even as possible. Since I didn't have a pizza stone, we made it rectangular which has a nice look to it, right?
We spread the canned pizza sauce on. I used about half a jar of it. Spread it so that it covers most of the pizza except about an inch from the border. Depending on how sauce-y you like your pizzas, you can put more.
Cover the pizza with the toppings that were set aside.
Sprinkle cheese on the pizza covering most of the pizza. I used a mix of Swiss and Gruyere because I like it, but you can use mostly any cheese that you like.
Your oven should be at 400°F. After preheated, put your pizza in for about 20 minutes. Keep an eye on it. When the cheese is nicely melted and the edges are browned, take the pizza out of the oven. I'd say, wait for it to cool a little, but I couldn't resist.
Mmmm, so yummy and easy! The whole wheat pizza dough made it seem healthier and is pretty good, though I still prefer normal pizza dough. Next time, I'd probably put more toppings, but this was very satisfying.

You can make pizza any way you like it, barbecue pizza, with chicken, bell peppers, anything! Even anything you have on hand, it'll be delicious.

3.03.2011

cream puffs

Cream puffs. I really like these and actually, they're kinda scary to make. But before I talk about that, let me introduce you to something...
Meet my first cookbook. Is it beautiful?! It's from Jess for my graduation present. I'm really excited to bake from this book, and this is my first!
Profiteroles is just the fancier way of saying cream puff. Maybe there's a difference, but to me, it's all the same. So I followed the recipe for the puff itself, but did not use the filling or the sauce.
After making the batter on top of the stove, I piped out about 1-inch mounds of dough. With a moistened fingers, I smoothed the tops. Then I baked them!
After they finished baking, I had to slit a hole into each of them and put it back into the oven, with the oven off and the door open, so the puffs would remain puffed and not deflate.
Cooled and ready to be filled! I made my custard which is the same recipe I use for fruit tarts! Very easy.
That's the tip I used, it's just so much easier and made it so that I didn't have to cut the puff in half to fill it.
A neat trick to fill the pastry bag is to put it in a cup and fold the sides of the pastry bag down. Then fill the pastry bag with your filling and that's it! So easy and makes your hands free.
Pipe it through the hole you punctured in it earlier. And there you have it, your cream puff!
Cream puff recipe (I halved the recipe and made about 26 cream puffs):
makes 4 dozen

Ingredients:
1 cup water
1/2 cup unsalted butter (1 stick)
1 cup unbleached all purpose flour
1/4 tsp salt
4 eggs

Directions:
Bring 1 cup water and 1 stick butter to boil in a medium saucepan over medium-high heat, stirring until butter is melted. Turn heat to low, add flour and salt all at once. Stir vigorously until mixture is smooth and dough pulls away from the edges and forms a ball, and leaves a thin film on pan bottom (about 2 minutes). Transfer to large bowl. Using a handheld mixer (I did it by hand! My workout), add eggs one at a time, blending well after each addition. Cover dough loosely with plastic wrap. Let dough stand and cool for about an hour.

Preheat over to 425°F. Lightly butter (I used parchment paper) 2 large rimmed baking sheets. Spoon dough into pastry bag fitted with 1/2 inch plain tip. Pipe 1-inch rounds on prepared baking sheets, spacing 2 inches apart (mine was more like 1-inch). Using moistened fingertips, smooth tops.

Bake puffs until golden brown and puffed, about 23 minutes. Remove from oven and turn off the heat. Pierce side of each puff with tip of small knife. Return the puffs to hot oven; let stand for 10 minutes with door ajar. Remove from oven and cool completely.

*Can be made one day ahead. Store in airtight container.

Pastry cream - kind of like a vanilla custard :]
You can find the recipe here at the fruit tart post. I halved this as well, but ran out of filling, so maybe be less generous or make the entire amount and be more generous (I'd go for the latter option).

Fill the pastry cream into pastry bag with 1/4 inch plain tip (I used star, I don't think it matters). Insert tip into cut on each puff and pipe in filling.

*Can be made 8 hours in advance. Cover loosely with plastic wrap and refrigerate.

3.02.2011

pulled pork tacos w/ guacamole and mango salsa

Pulled pork tacos. I'm not sure where I got an itch to make this, but I did. And it was easy, especially with a slow cooker (which I borrowed from tammy). I had more pictures but jwoo did not give them to me, so you'll have to settle with my ugly looking pictures.
I bought this humongo 10 pound bone-in pork shoulder. Way too big to fit into the slow cooker (it was a 6 quart) so me and jwoo went through this whole ordeal with chopping it in half. In the process, we de-skinned and de-fatted the pork (leave some fat because it tastes good). After, I made a mixture of cumin, brown sugar, salt, black pepper, paprika, oregano, and cayenne pepper and let the pork marinate overnight.

The next day, all I did was line the bottom of the slow cooker with quartered onions, lay the pork shoulder on top, cover the pork halfway with red wine, water, and salt mixture. Turn on the slow cooker, put it on low, 8 hours and leave it!
This is what it looked like after the 8 hours. The cool thing about the slow cooker is that after the time was up, the setting was turned to keep warm, so the pork was kept warm. It was beautiful. The meat was falling of the bone and it was nice and tender.
To shred it, we used two forks and just went at the pork.
Our final product. Or just the pork....
I served it with guacamole and mango salsa, which are so easy to make, cilantro, cabbage, and onions and mushrooms.
This picture is really sucky, but that's our taco!

So I didn't really follow a recipe, I looked at a lot of different recipes and created my own, so measurement wise...I wouldn't say it is super accurate.

Ingredients:
1 5-6 pound bone-in pork shoulder
Spice rub (recipe below)
2 cups red wine (can use red wine vinegar)
half a chopped onion
half a cabbage - shredded
approx. 50 torillas (corn or flour, I personally like flour better)
Guacamole (recipe below; optional)
Mango salsa (recipe below; optional)

Directions:
Take pork (this is de-skinned and de-fatted, unless you want to keep it) and massage spice rub into pork and cover in plastic wrap or in a zip lock bag. Refrigerate and leave to marinate overnight.

The next morning, line the bottom of the slow cooker with onion. Place the pork on top of the onion layer. Pour in the red wine, if it does not cover up to half, then fill it up with water to halfway. Cover with the lid, and turn your slow cooker to low for 8 hours and THAT'S IT!

After 8 hours, take pork out of slow cooker. Let it rest so the juices can flow into the pork and keep the pork moist. Shred the pork using two forks and there you have it!

Spice rub:
1 tbsp black pepper
2 tbsp salt
3 tbsp cumin
1 tbsp oregano
2 tbsp paprika
1 tbsp cayenne pepper
1/4 cup brown sugar

Mix all of this together in bowl and set aside until ready to use.

Guacamole:
4 ripe avocados
half a lime juice
1/4 cup diced onion (can add more or less based on your preference; can use red onion)
1/4 cup diced tomato (can add more or less based on your preference)
1 tsp salt

Mash the avocados up (depending on how textured you like it). Add in lime juice (this I eyeballed entirely since it depends on your taste) and salt. Mix in onion and tomatoes. Taste it and adjust accordingly.

Mango salsa
1-2 ripe mangoes diced
1 lime
1 jalapeno diced (may remove seeds for less heat)
1/3 cup diced tomato (can add more or less based on your preference)
1/4 cup diced onion (can add more or less based on your preference, can use red onion)
2 tbsp chopped cilantro
1 tsp salt

Mix everything together. Taste and adjust accordingly.

These are easy to make and all depends on how you like your food!
To put the taco together, take the warmed tortilla and place as much pork you want, then add the extras: guacamole, mango salsa, and shredded cabbage.

2.16.2011

s'mores cupcakes

I've been wanting to make s'mores cupcakes ever since I had it from Cupkates. Her's are so yummy and everything about is delicious. Anyways, so I tried...and it turned out not bad...not super great.
I made mini cupcakes because they're so much cuter. I liked my cupcake liners too, which are from Joanns.
I made the graham cracker crust and it was pretty oily. I used some salted butter since I ran out of unsalted and it tasted fine. It was kinda hard to use my fingers to press it in, so I used a teaspoon which worked pretty well.
Okay, so the chocolate cake mixture was really runny and water-y. I think I didn't like this chocolate cake, I would use a different cake next time.
Out of the oven! They're kinda funny looking.
My marshmallow frosting. I think it was too soft, so maybe if I let it on the heat longer, it would've been better.
Yeah, they didn't look too pretty. My piping skills are lacking for sure...
We didn't have a torch so we used a gas stove. It was pretty dangerous, but not bad and it worked! (Plus, having jwoo do it for me, made it dangerous for him, not me :])
I topped them with graham crackers and Hershey's chocolate. They looked way cuter, covering my ugly piping skills.

Here's the recipe:

Makes 48 mini cupcakes

Ingredients:
1 cup PLUS 2 Tbsp graham cracker crumbs (from 16 to 18 squares)
3 Tbsp sugar
5 Tbsp unsalted butter, melted
6 ounces bittersweet chocolate, roughly chopped

1 cup PLUS 1 Tbsp sugar
3/4 cup PLUS 2 Tbsp flour
7 Tbsp cocoa powder (not Dutch-processed)
3/4 tsp baking powder
3/4 tsp baking soda
1/2 tsp salt
1 large egg, room temperature
1/2 cup milk
1/4 cup vegetable oil
1 tsp pure vanilla extract
1/2 cup boiling water

Marshmallow Frosting (Recipe below)
Extra chocolate or graham cracker pieces, to garnish

Directions:
Preheat oven to 350 degrees F. Line 2 standard muffin pans with 18 cupcake liners; set aside. Place the graham cracker crumbs, 2 tablespoons sugar, and melted butter in a large bowl; stir until well combined. Place 1 tablespoon of the graham cracker mixture prepared earlier into the bottom of each prepared muffin cup. Use the bottom of a small glass to pack crumbs into the bottom of each cupcake liner. Reserve remaining graham cracker mixture for topping. Place 2 teaspoons of chocolate in each muffin cup. Set pan aside.

Sift the sugar, flour, cocoa powder, baking powder, baking soda, and salt together into a large bowl. Mix these together until evenly combined. In a separate large bowl, mix together the egg, milk, oil, and vanilla. Add the liquid mixture into the flour mixture and beat on medium speed for 30 seconds. Scrape down the sides of the bowl and continue mixing on medium speed for 1 to 2 minutes. Add boiling water and stir to combine; set cake batter aside.

Transfer the muffin pans prepared earlier to oven and bake until the edges of the graham cracker mixture is golden, about 5 minutes. Remove from oven and fill each cupcake liner three-quarters full with cake batter. Sprinkle each with the remaining chocolate and graham cracker mixture. Return to oven and bake until tops are firm and a cake tester inserted in the center comes out clean, 18 to 20 minutes. Transfer muffin pans to a wire rack and let cupcakes cool in pan for 10 minutes. Remove cupcakes from pan and let cool completely.

Transfer marshmallow frosting to a large pastry bag fitted with a large plain round, star, or French tip. Transfer cupcakes to a baking sheet or other heatproof surface. Pipe frosting in a spiral motion onto each cupcake. Using a kitchen torch, lightly brown the frosting, taking care not to burn the cupcake liners. Top each cupcake with a piece of chocolate or graham cracker, if desired. Serve immediately or store in an airtight container for up to 2 days.

Marshmallow Frosting
5 large egg whites
1 1/4 cup sugar
1/2 tsp cream of tartar
1 tsp pure vanilla extract

Place egg whites, sugar, and cream of tartar in the heatproof bowl of an electric mixer. Set over a saucepan with simmering water, making sure the water is not high enough to touch the bowl. Whisk constantly until sugar is dissolved and whites are warm to the touch, 3 to 4 minutes.

Transfer bowl to electric mixer fitted with the whisk attachment, and beat, starting on low speed, gradually increasing to high, until stiff, glossy peaks form, 5 to 7 minutes. Add vanilla, and mix until combined. Use immediately.

s'mores cupcakes courtesy of 6 bittersweets

*update*
Look at other people's baked goods here!